
A final inspection should confirm that work is complete, defects have been addressed, and the project is ready for handover. In practice, this is often where small but important problems slip through.
The issue is rarely that an inspection has not taken place. More often, it’s that the inspection may have been rushed, inconsistently recorded, or carried out without a clear final inspection checklist.
A missing seal, damaged finish or incomplete sign-off might appear minor. But once a project has been handed over, resolving these issues can become considerably more difficult.
So, what tends to get missed during final inspections, and how can teams reduce the risk?
What Is a Final Inspection Checklist?
A final inspection checklist provides a structured list of checks that should be completed before work is approved or handed over.
Depending on the project, it might cover workmanship, safety, equipment, documentation, outstanding defects and client approval.
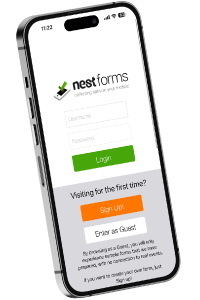
For construction and field teams, digital tools such as NestForms punch list app can make this process easier to manage. Inspectors can work through predefined questions, capture photographs and record problems while still onsite.
The land survey app aim is simple: make sure important checks are not dependent on memory.
Small Finishing Defects
Large defects usually attract attention. Small finishing problems are much easier to overlook.
These might include:
- Scratched or chipped surfaces
- Poor paint finishes
- Loose fittings
- Uneven sealant
- Damaged flooring
- Misaligned doors or cabinets
- Missing covers or trims
- A project completion report
Individually, these defects may not prevent handover. Collectively, however, they can create a poor impression and lead to a lengthy snagging process.
A structured inspection encourages teams to check each area systematically rather than simply walking through the site looking for obvious problems.
Work That Looks Finished but Is Not
One of the biggest risks during a final inspection is assuming that something is complete because it looks complete.
A fitted component may not have been tested. A door may be installed but not close correctly. Equipment may be connected but not fully commissioned.
Visual checks therefore need to be supported by functional checks.
Instead of asking:
“Is the door installed?”
a checklist might ask:
“Does the door open, close and lock correctly?”
The second question confirms performance rather than appearance.
Previously Reported Snags
A defect being marked as repaired does not necessarily mean it has been resolved correctly.
Previously identified snags should be revisited during the final inspection. Inspectors need to confirm that the work has actually been completed and that the repair has not created another problem.
This is particularly important where several contractors or teams have been involved.
Clear snag records, photographs and completion details provide inspectors with something concrete to check against.
Areas That Are Difficult to Access
Final inspections naturally focus on visible areas. Problems can therefore remain unnoticed in places that are harder to reach.
Examples include:
- Roof spaces
- Service cupboards
- Plant rooms
- Behind access panels
- Storage areas
- External boundaries
- High-level fixtures
- Less frequently used rooms
If an area is easy to forget, it should be explicitly included within the final inspection checklist.
Breaking the inspection into locations or sections can help ensure the inspector physically visits each required area.
Missing Photographic Evidence
A written note saying “damage repaired” provides limited evidence.
A photograph can show exactly what was inspected and what condition it was in at the time.
Images are particularly useful for defects, installations, safety measures and completed remedial work. They can also reduce uncertainty if a question arises after handover.
NestForms allows inspectors to capture and attach photographs directly to inspection responses, keeping the evidence alongside the relevant answer. The app also provides the ability to sketch within the app to provide visuals.
Safety Issues After Work Is Complete
Safety checks should not stop simply because construction or installation work has finished.
The final inspection may identify temporary equipment that has not been removed, blocked access routes, exposed materials or other hazards left behind.
Teams should consider checking:
- Emergency exits and access routes
- Barriers and temporary protection
- Warning signs
- Loose materials or debris
- Electrical covers and fittings
- Fire safety equipment
- Safe access to completed areas
A work completion report should be safe for the people who will actually use it.

Documentation and Certification
The physical work can be complete while the paperwork is not.
Certificates, manuals, test results, warranties and other supporting documents may all be required before handover.
These items are easy to overlook because they are not necessarily visible during a site walk-through.
The final inspection process should therefore include documentation checks alongside physical ones.
Measurements and Recorded Values
Some checks cannot be confirmed by simply selecting Pass or Fail.
Measurements, readings and other values may need to be recorded as evidence that the work meets the required standard.
Depending on the project, this could include dimensions, meter readings, equipment values or quantities.
Recording these details within the inspection creates a more useful record than relying on handwritten notes that have to be transferred later.
Client Sign-Off
A project can be technically complete without being formally accepted.
This is where client sign-off becomes important.
The final inspection should make it clear:
- What was inspected.
- Which defects remain outstanding.
- Who is responsible for resolving them?
- Whether the client accepts the completed work.
- When approval was provided.
Digital signatures can help create a clear record of this stage, particularly where inspection and handover happen during the same site visit.
Why Do Final Inspections Miss Problems?
The most common reason is not lack of experience. It is inconsistency.
An experienced inspector may know exactly what to look for, but workloads, interruptions and tight handover deadlines can still result in missed checks.
Different inspectors may also approach the same project differently.
A standardised final inspection checklist creates a repeatable process. Everyone follows the same core checks, while additional questions can be added when a particular project requires them.
How Can Digital Final Inspections Help?
Paper checklists can work, but they often create another stage of administration. Notes have to be deciphered, photographs matched to defects and reports prepared afterwards.
A mobile inspection form can capture information while the inspector is onsite.
With NestForms gps land survey app, teams can build inspection forms that include photographs, signatures, GPS locations, measurements and conditional questions. Forms can also be completed offline when connectivity is unreliable and synchronised afterwards.
This means the inspection record is being created as the work is checked, rather than reconstructed later.
What Should Happen Before Handover?
A final inspection should do more than confirm that a site looks finished.
It should provide evidence that required work has been checked, outstanding problems have been recorded and the appropriate people have approved the result.
Before completing the handover, teams should be able to answer three straightforward questions:
What was checked?
What still needs attention?
Who approved the completed work?
If those answers are clearly recorded, the chances of defects becoming arguments later are considerably reduced.
A well-designed final inspection checklist helps make that possible. By giving inspectors a consistent process and a reliable record, small problems are more likely to be found while there is still time to put them right.
NestForms helps construction and field teams create digital inspection checklists, capture onsite evidence and produce clear records of completed work.
At NestForms we offer a free Training Demo as an introduction to the platform if you need it. For larger operations we also provide more detailed Assisted Onboarding.
Start your NestForms journey today and sign up for the free two week trial. You can review and test all of the features available to Premium plan users during this period.