An administrator can add the GPS component into a form giving the responder the ability to accurately state their location. Exact locations are necessary for many types of outdoor inspections and checklists, especially for staff working at remote locations. For example, surveyors would need to provide exact locations when using NestForms as a Land Survey app.
When using GPS, you can decide the minimum level of accuracy required when collecting GPS coordinates out in the field.
It is important to remember that adding a GPS location is strictly based on coordinates given to you via a GPS satellite. This is not to be confused with wifi location coordinates (which are less accurate).
Setting up the GPS component #
You can rename the component by clicking into GPS Location

Underneath the title bar you will see three buttons. These are:-
- GPS (DMS) - Degrees, Minutes and Seconds
- GPS Decimal (DD)
- ITM (Irish Transverse Mercator)
GPS Accuracy Levels #
When adding the GPS component to your forms, you can choose between three minimum levels of accuracy: The Required precision field provides a dropdown menu where you can select one of the following:
- Any Location Precision (Checks the device GPS, Wifi & Mobile data location, no accuracy limits set)
- Medium Require GPS (Set as default - Checks GPS only - within 100 metres)
- High Maximum Precision (Checks GPS only, within 20 metres, slower)
The differences between these options are purely based on your required level of accuracy.
Examples for Any Accuracy
- If you are working with low specification devices that do not contain a GPS module (this can be the case with certain Android devices)
- Your survey is being processed inside buildings or within urban areas with tall buildings - where it might be more difficult to acquire the GPS signal.
Examples for Medium Accuracy (default option)
- You require a standard location and you want to be sure that it has a minimum level of accuracy.
- If you are not sure, just simply set Medium as the default and confirm the results are sufficient.
Examples for High Accuracy
- If you need to collect more exact coordinates of a location of interest. Then use the High option. This will work only when you can see the sky without any physical barrier.
Map Select #
There is a check box Allow map select. When the Allow map select option is enabled, you can choose the coordinates within the map view. The reason people might wish to use Map select is to cater for when responders are unable to obtain a GPS signal in certain environments.
Additional settings #
There are also two other checkboxes within this component. These are:
KML files - Check the KML (Keyhole Markup Language) box if you require any additional information or detail added as an overlay to your map.
Organisations who may require extra detail as an overlay on a map typically include land surveyors, forestry or offshore fishing for catchment areas etc.
Required - By checking the Required field the responder must enter an answer into the component before being able to move to the next question on the app.
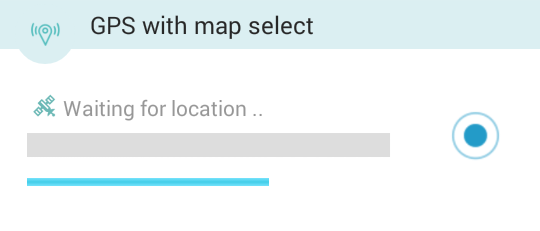
Below is a screenshot from the app when there is no location found yet
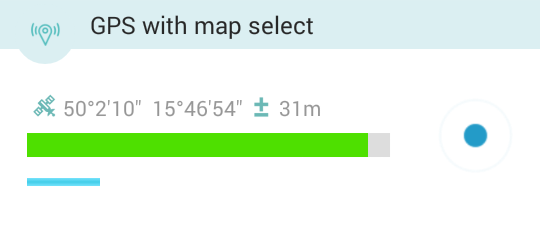
Screenshot from the app, when the location was just found, but the app will still scan for a few more seconds waiting for a more accurate location: