User Group management features are limited to Advanced and Premium subscriptions only
When you have added many members, it could become more difficult to manage them.
If your organisational structure allows you to assign your relations into groups, you can use the same approach in NestForms.
Steps to create a group:
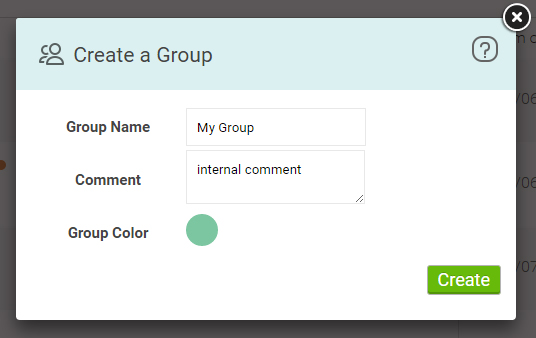
Create groups - Go to Relations and click on Create a Group link in the submenu. ![]()
- Set the Group Name
- Add a Comment for internal purposes as you wish.
- Assign a colour for better visual enhancement.
- Then press Create
- Once the group is created, a popup window will appear allowing you to add members to the newly created group.
Group Management
First you’ll need to display the groups on your Relations page. This is done by changing the Display setting. The Display option![]() is located within the menu. Once you select Group
is located within the menu. Once you select Group ![]() , the groups will then appear.
, the groups will then appear.
Groups are shown with large colourful headings. There are edit options that will display when mousing over the heading.
The options available for groups are for managing the members and changing the information about the Group (e.g. name, colour).
Multiple member groups
You can assign a member to multiple groups. Members will then be displayed in every group to which they are assigned. The same applies to group admins. You can have one group admin assigned to multiple groups at once.
Set the Group admins
If there are specific members within the groups that manage relations, it might be useful to visualise this also. Just mouseover the member and click to the icon Edit member Assignment.
You can change the group that the member is in and also tick the checkbox called Group Admin. This will display a small crown beside their avatar from now on, so you will be able to identify these users much more quickly in future.
Using Groups in Form Sharing
When sharing the form on the form builder, you will see all your groups at the top with the number of people assigned within each group.
If you want to assign all members within a group, just click this group button and the form will be shared with all members within this group.
Share form permissions #
When you have group admins, you might want to give them additional permissions to either approve the results within their group, or manage the shares for the form.
You can easily manage this in the form builder Advanced Settings when you click to Share Permissions. Group admins are always at the top of the screen to allow you to manage their permissions more efficiently.
You can see 2 additional options that you can assign to members within the group - ![]() Group Form Share - the permission to manage who the form will be shared with but limits the options to the members of the group only.
Group Form Share - the permission to manage who the form will be shared with but limits the options to the members of the group only.
![]() Group Approve Responses - allows users to review, approve and export results from all members within the group.
Group Approve Responses - allows users to review, approve and export results from all members within the group.
You can click on each specific permission to allow one by one, or just click to the member tile which will select both group permissions with one click.
If you want to know more about the main sharing permissions, have a look at the Administrator Form Share help page.
What your relation will see #
When you enable the Group Form Share permission, your relation with this permission will then see the new tab in the Forms list called Shared Forms.
Shared Forms contains a list of the forms that they have permission to manage. On mouseover, two icons will appear (providing both permissions were shared).
Group Form Share
Allows your colleague to share this form or stop sharing with members of the group.
Always remember that the Main account administrator must have all members within their relations, not the group admin account.
Group Approve Responses
Your colleague will be able to see responses from other members of the group for this form. This user is authorised to reject responses as well.
How can a group manager add new members to a master account? #
Just login and add the member into your account.
If you are the group manager, then you will be able to promote any user into your master account. Go to Relations, mouse over the relation you want to promote and click on ![]() .
.
A lightbox with more details will be displayed and you can click on the Promote button.
You will then be able to assign this promoted relation to the forms of the master account (if you have group shared permissions).
Your master account will be notified that there was a new relation added to their account.
Managing multiple departments within your account #
- All forms will be created within your admin account (this is necessary in order to keep them within your paid account)
- You can share full admin rights for all forms with a secondary administrator (which means that they will also have full access to all of your forms)
- You can then create user groups within Relations for all of your departments. Managing groups help page.
- You can then assign users into these specific groups and also set the department admin users to be a Group admin.
- You can also set branding for each of your departments if you want to group the forms within your forms list (This is not a requirement).
- Once this is set up, you can share each form with a specific department - just edit the form and click on the relevant department within the Share popup.
- If your department admin users are managing form sharing, form builder and/or the Responses, make sure to edit the form and assign them group admin rights. As you have set office users as the group admins, they will be easy to spot as they will have the crown icon in the administration share popup.
There are different permissions you can assign to your administrators including:- Edit form in the Form builder
- Manage sharing within their user group
- See all responses within a group