Your NestForms Dashboard Explained #
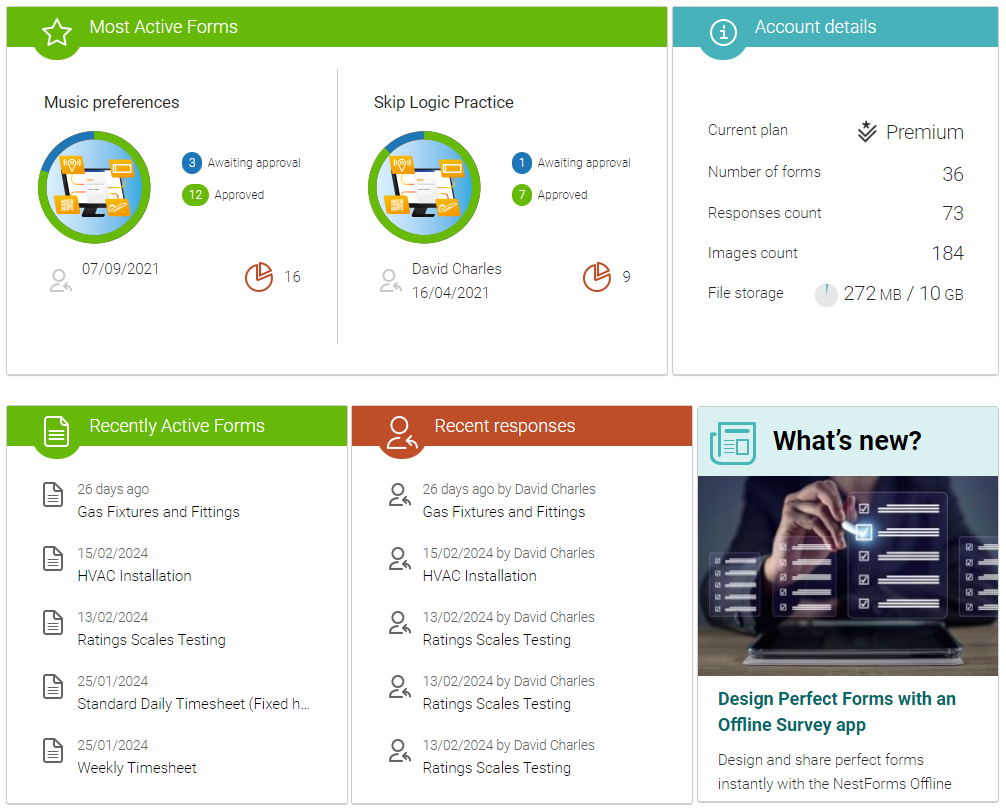
Upon logging into NestForms, you'll be greeted by the dashboard, which provides an at-a-glance overview of recent activity within the platform in relation to your forms. The default dashboard includes the following data:
- Most active forms
- Recently active forms
- Most recent responses
- Account details
- A rolling news section with the latest blogs and features

Dashboard Customisation Options #
You have the option to customise the dashboard to suit your requirements. For example, you can remove default items like rolling news or account details if they are not useful to you.
If you're happy with the default settings, you might just want to rearrange them in an order that suits.
There are many customisation options available beyond the default settings, including the ability to create multiple dashboards, though only one can be active at a time.
Dashboard Settings #
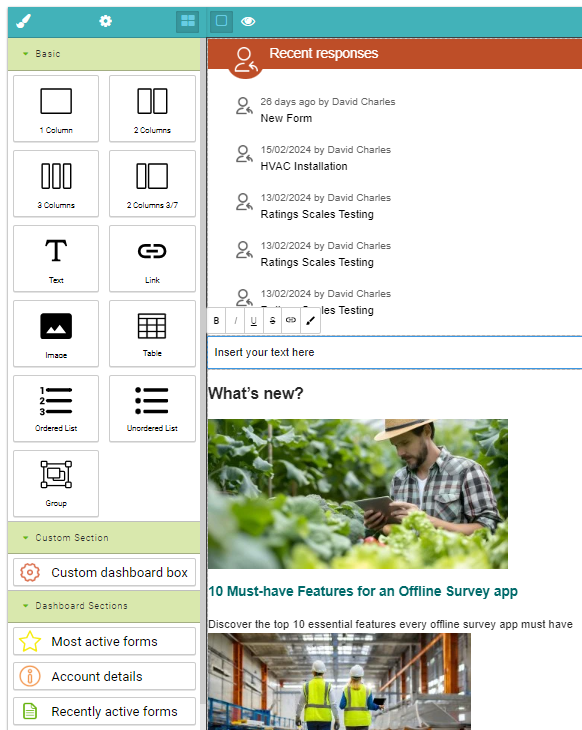
Above the default dashboard items, you'll find the dashboard Settings button on the right. Clicking on Settings allows you to create a new custom dashboard. This will open a blank area where you can drag customisable elements from the column on the left.

The top of the left-hand column also provides options to use standard Style Manager formatting within any of the elements.
Once you have dragged items into the dashboard layout, you can customise them further. For example, when inserting text, you can use standard HTML tags. In addition to the default settings, you can also include columns, links, images, tables, ordered or unordered lists. This allows you to add your logo, add your own quicklinks to go to your other favourite tools such as Google Drive folders, Microsoft OneDrive directories, etc.
Each new element provides four blue icons allowing you to move or clone the section. You can also delete, or select the parent component. (Select parent component might be useful when you want to select, for example, a table cell, a table row or table).
To preview the dashboard, click the Eye icon at the top of the new dashboard layout section. Don’t forget to save your new dashboard.
On the list of dashboards, you can mouseover the dashboard and click to tick to make the dashboard active.
If you can't find what you're looking for within these customisation elements, we'd love to hear from you to discuss your requirements.


