As your new form is a document you will first need to give it a name or title before adding any of the form features or what we call Components.
It’s very simple to create your first survey using the NestForms mobile form app. There are a number of components you can use, such as Text, Numerical, Images, Audiofiles, GPS and many others. You can select Multiple choice, Dropdown or use a Single answer component. Basically you can tailor your form depending on what data you require for your survey or report and to the various formats it can to be presented.
So where do I start? #
When you are logged in, just click on Forms in the main menu.
Then click on Create New Form and you can start with your first blank form.
The first thing to do is give your form a title.

Then you can create sections, by dragging and dropping the components you require for your survey form.
Afterwards, just edit the names of your questions. Some questions allow you to change additional features as well (eg set the answers for the single answer component).
You can then Share your new form with your colleagues who have downloaded the NestForms app.
Once you have saved your new form and shared it with your relations, it will then appear within their NestForms app.


You can also drag items up and down setting them wherever you want them to appear on the form.
Clicking on a question within the form allows you to edit the content and features in the right hand column of the page.
You can also view the whole Form Creation process in more detail including a video tutorial on the Introduction to NestForms help page.
Share #
You can share your form with your friends and colleagues.
When you click on the Share button, the Share your form window will open.
This window contains all of your Relations.


You can select the people you wish to collect data from, by just clicking on their names.
Click OK and all selected members will appear as small icons beside the share button.
When you save the form, all selected members will see the form in their app and they will be able to begin collecting data instantly.
If you would like some information on adding new relations to your form, see the Relations help page.
There are also several advanced options like choosing a client, prefilled response name and setting your form branding if you are interested.
Don't forget to save your form once you finish! #
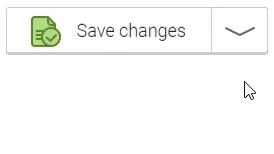 You can Save your work by clicking the Save changes button under the form.
Save as New will create a copy of the form within your account you've been working with, and will leave the original unchanged.
Note: If you wish to copy your form into another account, use the Clone form option instead.

Save and Stay saves your latest updates to the original form in the same way as Save changes, but lets you continue editing the form without losing your work.
When you make any updates to your form, a blue save button will appear in the bottom right corner of the page. The blue save button appears every time you alter or make changes to your form but have not saved these changes yet.
When you hover over the blue Save button, you can see the same additional options as mentioned above.
Both save options have the exact same functionality and the same end result. The reason that there are two ways to save your form is to help make life easier depending on how you are using NestForms and to prevent you from leaving your form changes unsaved.
Below is a screenshot of the main Form builder interface to allow you to get your bearings.

It can be quite common that you may wish to alter or make an amendment to a form after it has been shared. This could be due to a mistake that you need to fix or certain content / data needs to be updated.
You can just select the form from the Forms List and make your required change. Once you have Saved the change, the app will automatically update to the latest version of the form without the responder having to intervene. This is provided the responder is within the app and online, otherwise, the form will update once the responder is reconnected to the Internet or reopens the app.
Sections #
If you have a simple form with just a few questions, you probably don't need to create sections.
If you have a detailed form requiring lots of information you may want to break up your document into smaller sections.
Once you have created and named your new form you can see that it already starts with ‘Section 1’ underneath the Questions Title bar before you add any of your components. If you mouseover or click on the ‘Section 1’ heading the option to edit the title appears if you want to change the section name to something other than ‘Section 1’.
Underneath Section 1 you have dragged and dropped maybe three or four components relating to certain information required. As the subject changes you can add a new section by mousing over and clicking on the ‘+ Add new section’ bar at the bottom of your form. The new section will automatically be named Section 2, which you can also change in the same way as section 1.
There are also options to duplicate, copy and delete a section by mousing over the right hand side of the section title bar to the 3 dots icon.
Duplicate simply copies the section heading within your current form. When you copy a section you can place it into any other forms you have created.
This makes it easier for your associates to perform the survey as they will be filling in separate smaller sections that are easier to read and complete.
Remember also you can edit the component names as well as the section names

Components #
When creating a new form there are many components available:
- Text - Allows you to enter free text (either one line or multiple lines).
Learn more about Text - Single answer - Or “Radio Buttons” if you prefer to use the technical term. It allows the end user to choose one option from a small list of choices. All of these are visible (suitable for small choice lists like yes, No, I don’t know).
Learn more about Single answer - Multiple Answers - Similar to the single answer option except it allows for multiple selections.
Learn more about Multiple answers - Dropdown menu - You can select only one option, but this is suitable for longer lists.
Learn more about Dropdown menu - Document - Allows responders to easily attach PDFs, Word documents, or Excel files to form responses.
Learn more about Document - Images - This allows the uploading of images. You can add multiple images in this section.
Learn more about Images - Comments - Allows to add multiple comments.
Lear more about Comments - Audio - Allows you to record a short audio file. If for example, the response is more than 100 words. It can be easier than writing the comment itself.
Learn more about Audio - Signature - Opens up a drawing board which allows you to make a signature using the touchscreen. The signature is then saved as an image.
Learn more about Signatures - Sketch - Allows responders draw directly in the app, offering a simple visual way to record key details on site.
Learn more about Sketches - GPS - Records the current GPS coordinates of the event.
Learn more about GPS - Numbers - Only a number can be entered for this component. It can be used either manually or entered via a slider option, it also supports the option for a range from 0 - 20, or 100 - 200 etc. You can also choose whether the number will be in integer or decimal form.
Learn more about the number component - Calculate - Make your own formulas and evaluate the calculations when filling data. Allows you to set number logic to display follow up components.
Learn more about Calculations - Dates and Times - For creating a timestamp for the survey or selecting dates manually, options are to enter the date, time, or date and time.
Learn more about Date & time - Barcode and QR Code reader - For anybody who is using QR codes or bar codes. Both of these can be scanned and stored within the results.
Learn more about Barcode and QR code scanning - Note - This is passive information that can be viewed by the user performing the survey via the app. It is for informative purposes only, for example, explaining some details of the form if necessary.
Learn more about Note - Horizontal separator - Used just to separate logical blocks of your survey or questionnaire, helps to break up the presentation of your form.
- Autocapture - Allows you to automatically fill in certain data into your Responses (eg: the name of the Responder, Date & Time, IDs etc.).
Learn more about Autocapture
This field is not visible to the responder within the application, but is available to the administrator in returned responses.
Learn more about Autocapture - Feature button - The Finish button is the last button that the user normally clicks on when their data entry is finished. When you select the “Finish & new” option, it speeds up the process of starting a new survey. There are also further options available like Clone section or Save.
Learn more about the Feature button
To create your Form, you just drag and drop a component from the “Components” section on the left and drop it into the Questions section in the middle of the page.
If you want to see how each component appears within the app, check out the App Components help page.
Excel form import #
If you already have forms or would prefer to create your forms in Excel, you can also achieve this with NestForms and then import your excel file into your NestForms form. See more in the Excel form import help page.
Generate a form using AI #
You can use this feature to quickly create mobile checklists, audit forms, inspection reports, and completion forms from images or PDFs.
Steps
- From your Dashboard or Forms List page, mouseover Create new form in submenu.
- Click to Generate from file.
- Click the Choose file button to upload your form image from your local drive.
- Click the green Import button.
- Wait for the form template to process and appear within NestForms. Larger images may take slightly longer.

Your form will open within the NestForms form builder. You can then review the generated form and make any changes needed to suit your requirements.