This help page explains in detail the options you have when exporting your responses to PDF format.
From the Forms List select the appropriate form to get to the Responses Page. When you mouseover Export in the submenu you can see all of the options for the different formats you can use. The first option is Export to PDF.
Exporting a Single Response
For exporting a single response, when you mouseover any particular response from the list you will see icons appear within the Last Update column.
![]()
Clicking to the first icon allows for an export as a single PDF document. You will also see icons for exporting as a Word document and for downloading images from this response to a Zip file.
Exporting Multiple Responses as Single and Multiple files
Should you choose to export multiple responses, then underneath the green Responses title bar, when you mouseover Export a dropdown menu will appear. The first option on the list is to Export to PDF.
By clicking on Export to PDF a lightbox will appear giving you three options (Single, Multiple Files and Settings). These options allow you to:
Export your responses as a Single File - One PDF file containing all the responses will be generated.
Export each response to Multiple Files - Multiple PDF files (one file per response for each response) will be generated and will be downloaded within a ZIP file.
Just remember that all responses matching the current filter will be exported, so if you want to generate a PDF for a smaller set of the responses, just apply a filter based on your requirements and then process the export to PDF.
Settings Button
Before choosing either of these you can use the Settings button on the bottom right of the graphic below to modify or alter your responses.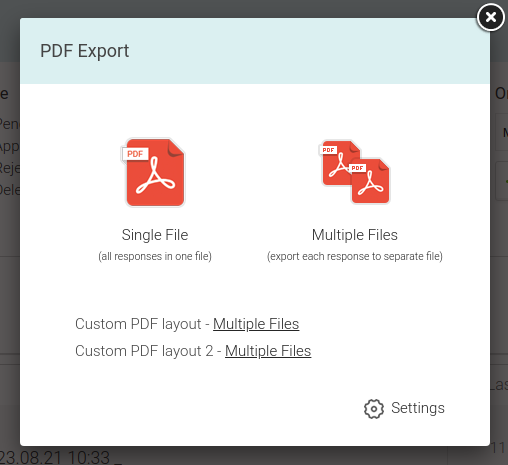
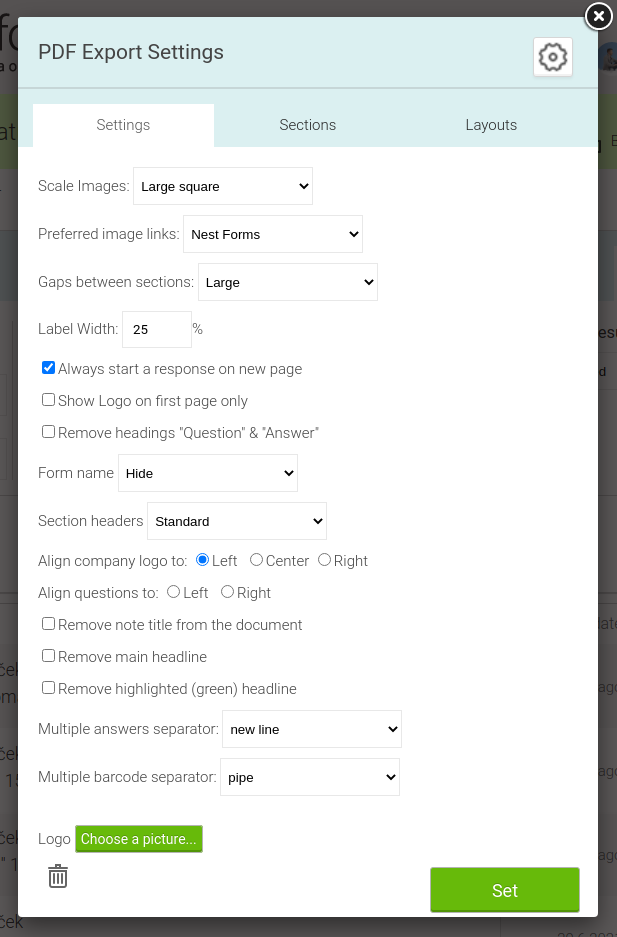
By clicking on Settings another lightbox will appear showing a list of all the options you have to alter the format and tailor the appearance of your responses. Some of these options might not be available based on your subscription plan. (eg logo is not available for standard subscriptions).
PDF Export Settings #
Options within PDF Export settings
The options you have to tailor the format of your responses are as follows:
Scale images
By clicking on the dropdown box here you can choose from five options to tailor the appearance of the images within your responses for your export. You can select either a large or small square.
Choosing the square option means that the ratio will be retained, but that the outer areas of the images outside the square will be cropped.
The other options allow you to choose small, medium or large within the original image ratio.
Preferred image links
By clicking on the dropdown box you will see three options. You can use NestForms, External or No links. By default, NestForms exports are linked to the full size images in NestForms. However this might not suit your requirements, if for example you are deleting the Responses from NestForms quickly. If you do export your images to Google drive, Microsoft OneDrive, SharePoint or Dropbox and choose the External option, then images in PDF will be directing clicks to these cloud providers. If you do not want to link to the source files, you can set No links and there will be no image links added to the exported PDF.
Gaps between sections
Here you can select the size of the gaps between your sections. You can choose from Large, Medium, Small, Tiny or no gaps.
Label width
This allows you to select the width of the columns in your exports. Using the number controller you can choose from a minimum 20% to 80% maximum of the labelling column. If you choose a small label size, the label will be narrow and there will be more space for your responses which might be especially useful if you have longer user content or multiple images.
Directly underneath Label width you can see three check boxes where you can choose to either:
Start each response on a new page - This applies for the Single file PDF export where you choose to start a new response on the new page or just continue within the previous page.
Show the brand or company logo on the first page only - By default (unticked) the logo displays in the header of each page within the PDF document. If unticked the logo is only on the first page and there is more space for your data to appear.
Remove the headings ‘Question & Answer’ where there are unanswered questions - By default, each section table starts with the heading “Question” and “Answer”. If you feel this is not required within your export, just tick the checkbox and these headings will be removed.
Form name
Determine if you want to hide or display the form title in your export. Should you wish to display the form name you can choose to highlight it with the colours of either green, blue or orange.
Section headers
Choose to display or remove the section headers. Display is set as standard and is the default setting. You can also choose to highlight the section headers in green, blue or orange.
Align company logo to
Here you will find three buttons where you can choose an option to have your company logo to the left, centre or right. This will only work with your business logo and not the default NestForms logo.
Align questions to
Here you will find two buttons which will allow you to align your question either left or right within the question column.
Underneath you will find three further checkboxes giving you the options to:
- Remove note title from the document.
- Remove main headline from the response. By default the PDF export contains a black heading with the text Report details for the Event followed by the response name. If you tick this checkbox, this heading will be removed.
- Remove highlighted (green) headline By default the PDF export contains a block with green background containing the response name, name of the responder and the response date. If you tick this checkbox, this block will be removed.
Multiple answer separator
By selecting the dropdown menu here you can see the various options you have to display any responses that have been received through the Multiple Answers component. You can view the answers broken up with commas, a pipe ( | ) symbol or full stops. Alternatively you may wish to display the answers as a list. Comma is the default setting.
Multiple barcode separator
By selecting the dropdown menu here you can see the various options you have to display any responses that have been received using Multiple barcodes. You can view the answers broken up with a pipe ( | ) symbol, commas, or full stops. Alternatively you may wish to display the barcodes as a list. Pipe | is the default setting.
Logo
Here you press the green button which will allow you to upload an image of your company or business brand/logo. If you do not choose a logo, the Company logo that is set in your profile will be used.
The Set button
If you have made any or multiple changes to the settings for the layout of your export you need to press the green Set button at the bottom right of the settings lightbox. You will need to scroll down for it to come into view.
When you have set the changes you will be taken back to the original lightbox. We always recommend that you review the PDF result after you have made any changes to make sure your PDF exports meet your requirements. All of these settings will take immediate effect to any PDF exports made after the settings are updated.
Only the admin user or user with full permission to edit the form and approve responses can see and update the PDF export settings, but these changes will affect any other users as well (VIP client sections, members with group approve responses etc)
Sections Tab
The Sections tab allows you to select any particular sections you want to start on a new page. Use the checkbox beside each of the section headings to select them.
Layouts Tab
On the Layouts Tab you can find the following options:
Form header: the default option here is None. However, you can choose a custom header where you can specify the text that will appear at the top of the generated PDF document.
Response header: Again the default option is None or you can customise the text above each response. This is similar to the Form header for one response per PDF, but if exporting Multiple Responses into one PDF, then this option will display the text above each response.
Include a PDF footer which is the default setting. Again you can choose not to have a footer or have a customised one.
You can fully customise your PDF export. Underneath the PDF footer tab you can find options to either add a new customised layout or import an existing one. If you would like to learn more on how to customise and enhance the appearance of your PDF reports, please visit our Custom PDF help page.
Removing the NestForms Logo #
In order to remove the NestForms Logo you must be either a Premium subscriber or have added Custom PDF as an Additional paid module within the Standard and Advanced subscriptions.
Branding is important for many clients when producing their final reports. When using Custom PDF as a Premium subscriber you have the option to remove the NestForms brand from your final reports. This feature is also available to Standard and Advanced subscriptions as an Additional paid module.
This is available as an additional paid module called Fully Customised PDF (allows you to customise your logo and content in PDFs) and is unlocked when you subscribe for it.
You can do this when you go to the Reports page, mouseover Exports, click to Settings, then click to the PDF icon, click to the Layouts tab and click to Unlock module.
Steps to remove the NestForms logo #
In order to remove the NestForms Logo, you must first make sure your own logo is in place.
There are multiple ways you can remove the Logo.
Option 1 - Mouseover Exports, click to Export Settings, click to PDF, scroll down to Logo and choose picture. When selected from your library, click Done.
Option 2 - You should be able to upload your company logo in your profile if required.
https://www.nestforms.com/branding-your-survey-forms
Option 3 - If you need this just for the Custom PDF, you should be able to choose your own header - https://www.nestforms.com/help-custom-PDF#Custom-Headers-and-Footers